
The Green Clover

I seriously need to take down my Christmas wreath!!! I am so serious! It was the first wreath I’ve ever made during this past Christmas holiday, and now I’m hooked… literally, LOL!!! :)! It has been up since the beginning of December, and it’s now MARCH!!!! Only me! :)
I’ve skipped over New Year’s and Valentine’s Day right into St. Patrick’s Day to make a wreath for this holiday. Besides, the way time is going by so fast, by the time this wreath gets hung it’ll be the 4th of July…. LOL :) Enjoy!

FOR THIS PROJECT YOU WILL NEED THE FOLLOWING SUPPLIES:
Glue Gun
Scissors
Plastic Gold Coins or whatever trinkets or ornaments you want to add
Step One:
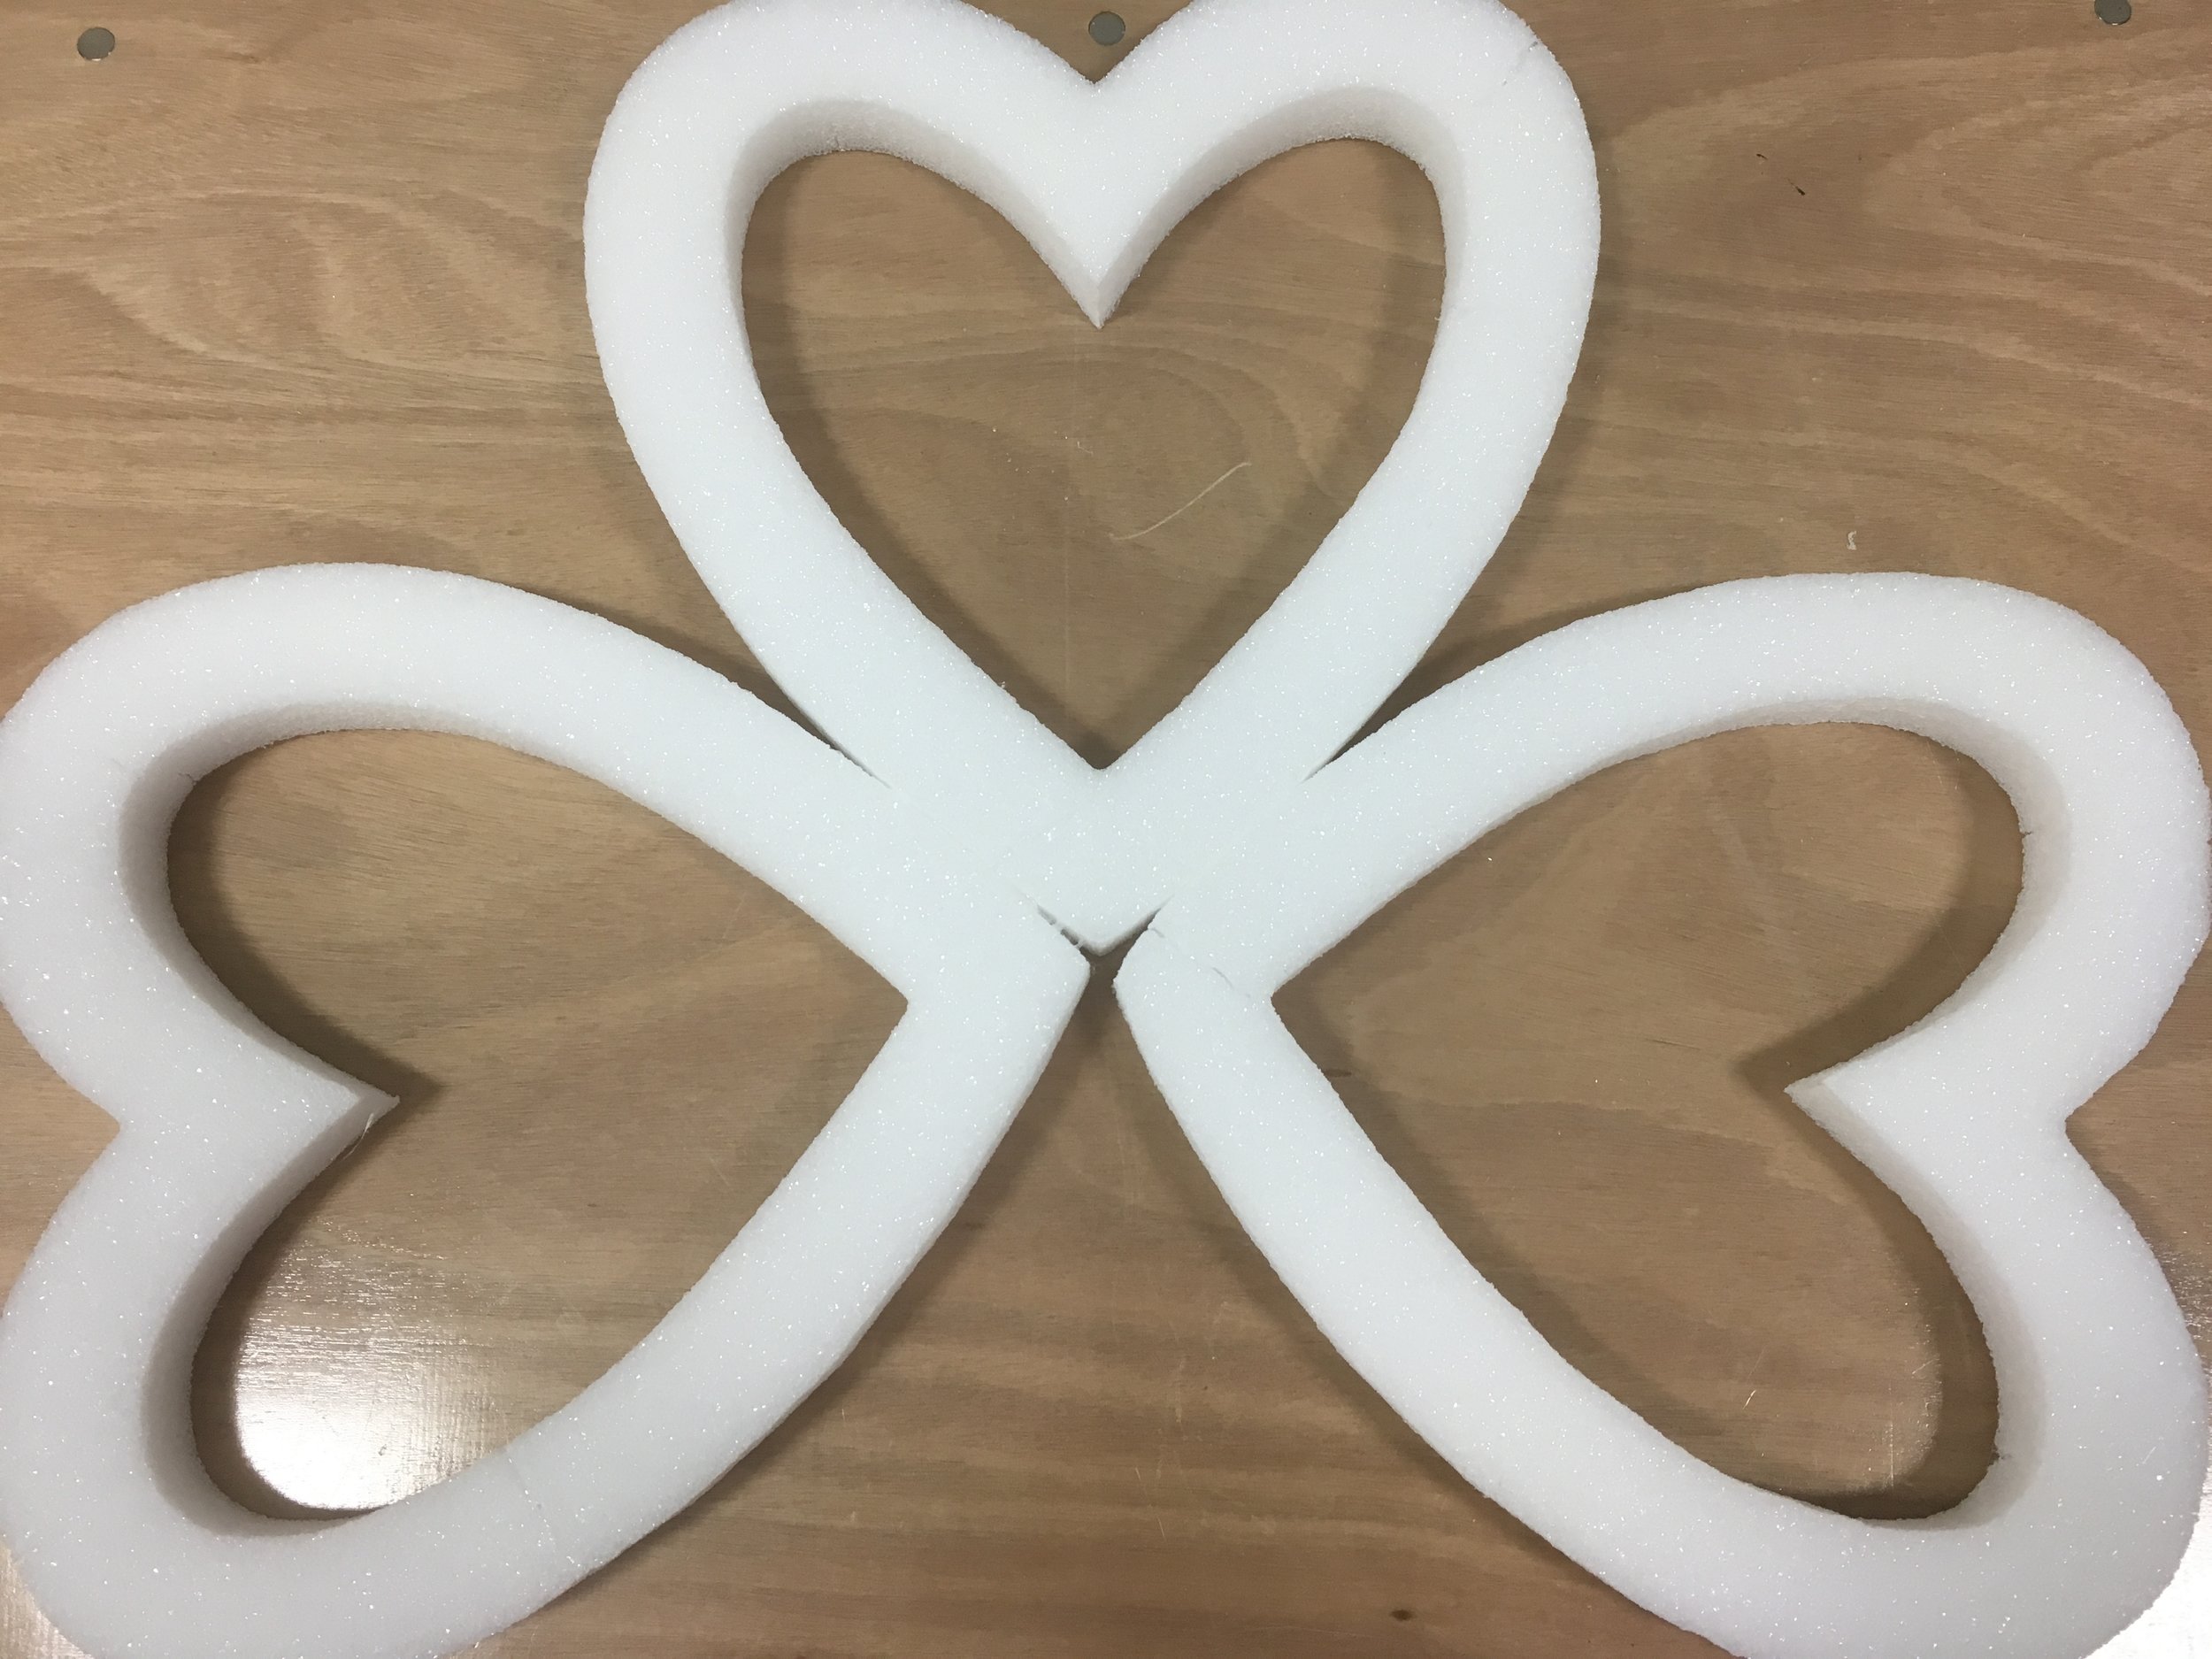
Place your 3 foam hearts together to shape a 3 leaf clover. Secure by hot glueing the pieces together.
Step Two:
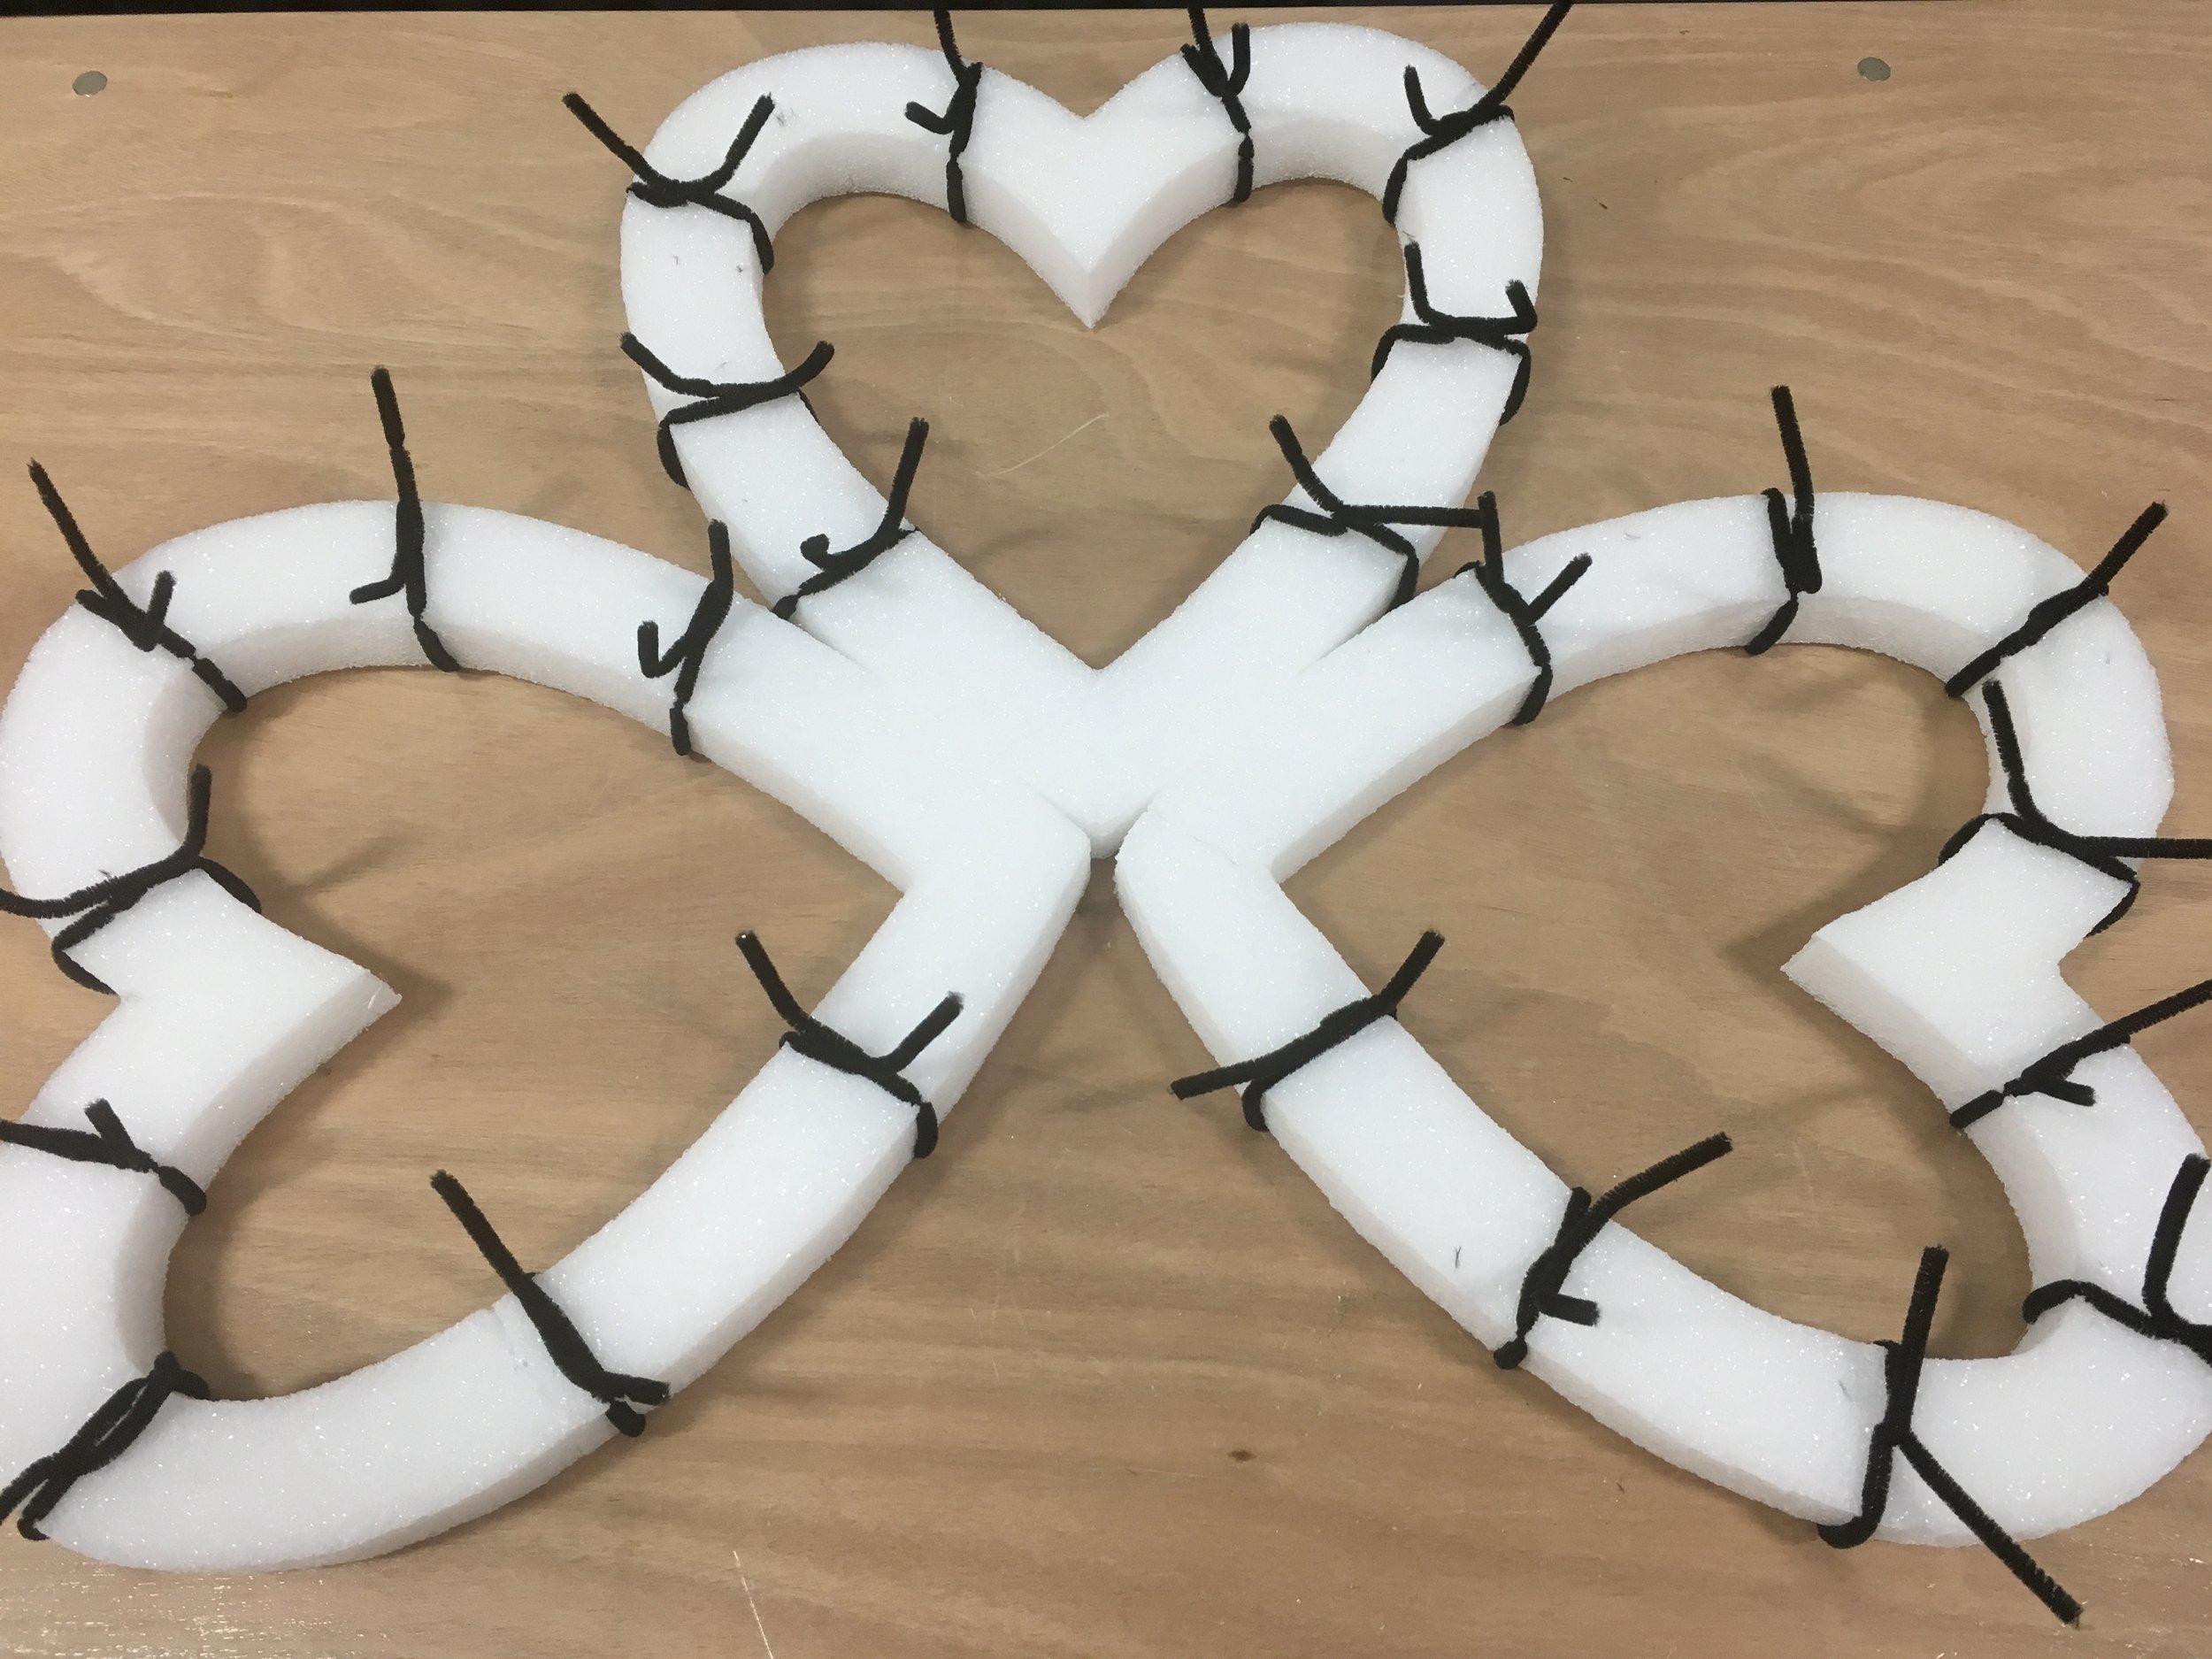
Take your Chenille Stems and tie them around various sections (both inside and out) of your wreath. Make sure you wrap them at least 3 times to ensure security of the stem. Do not cut off the access stem.
DIY TIP: I added a touch of glue after I finished wrapping my stems.
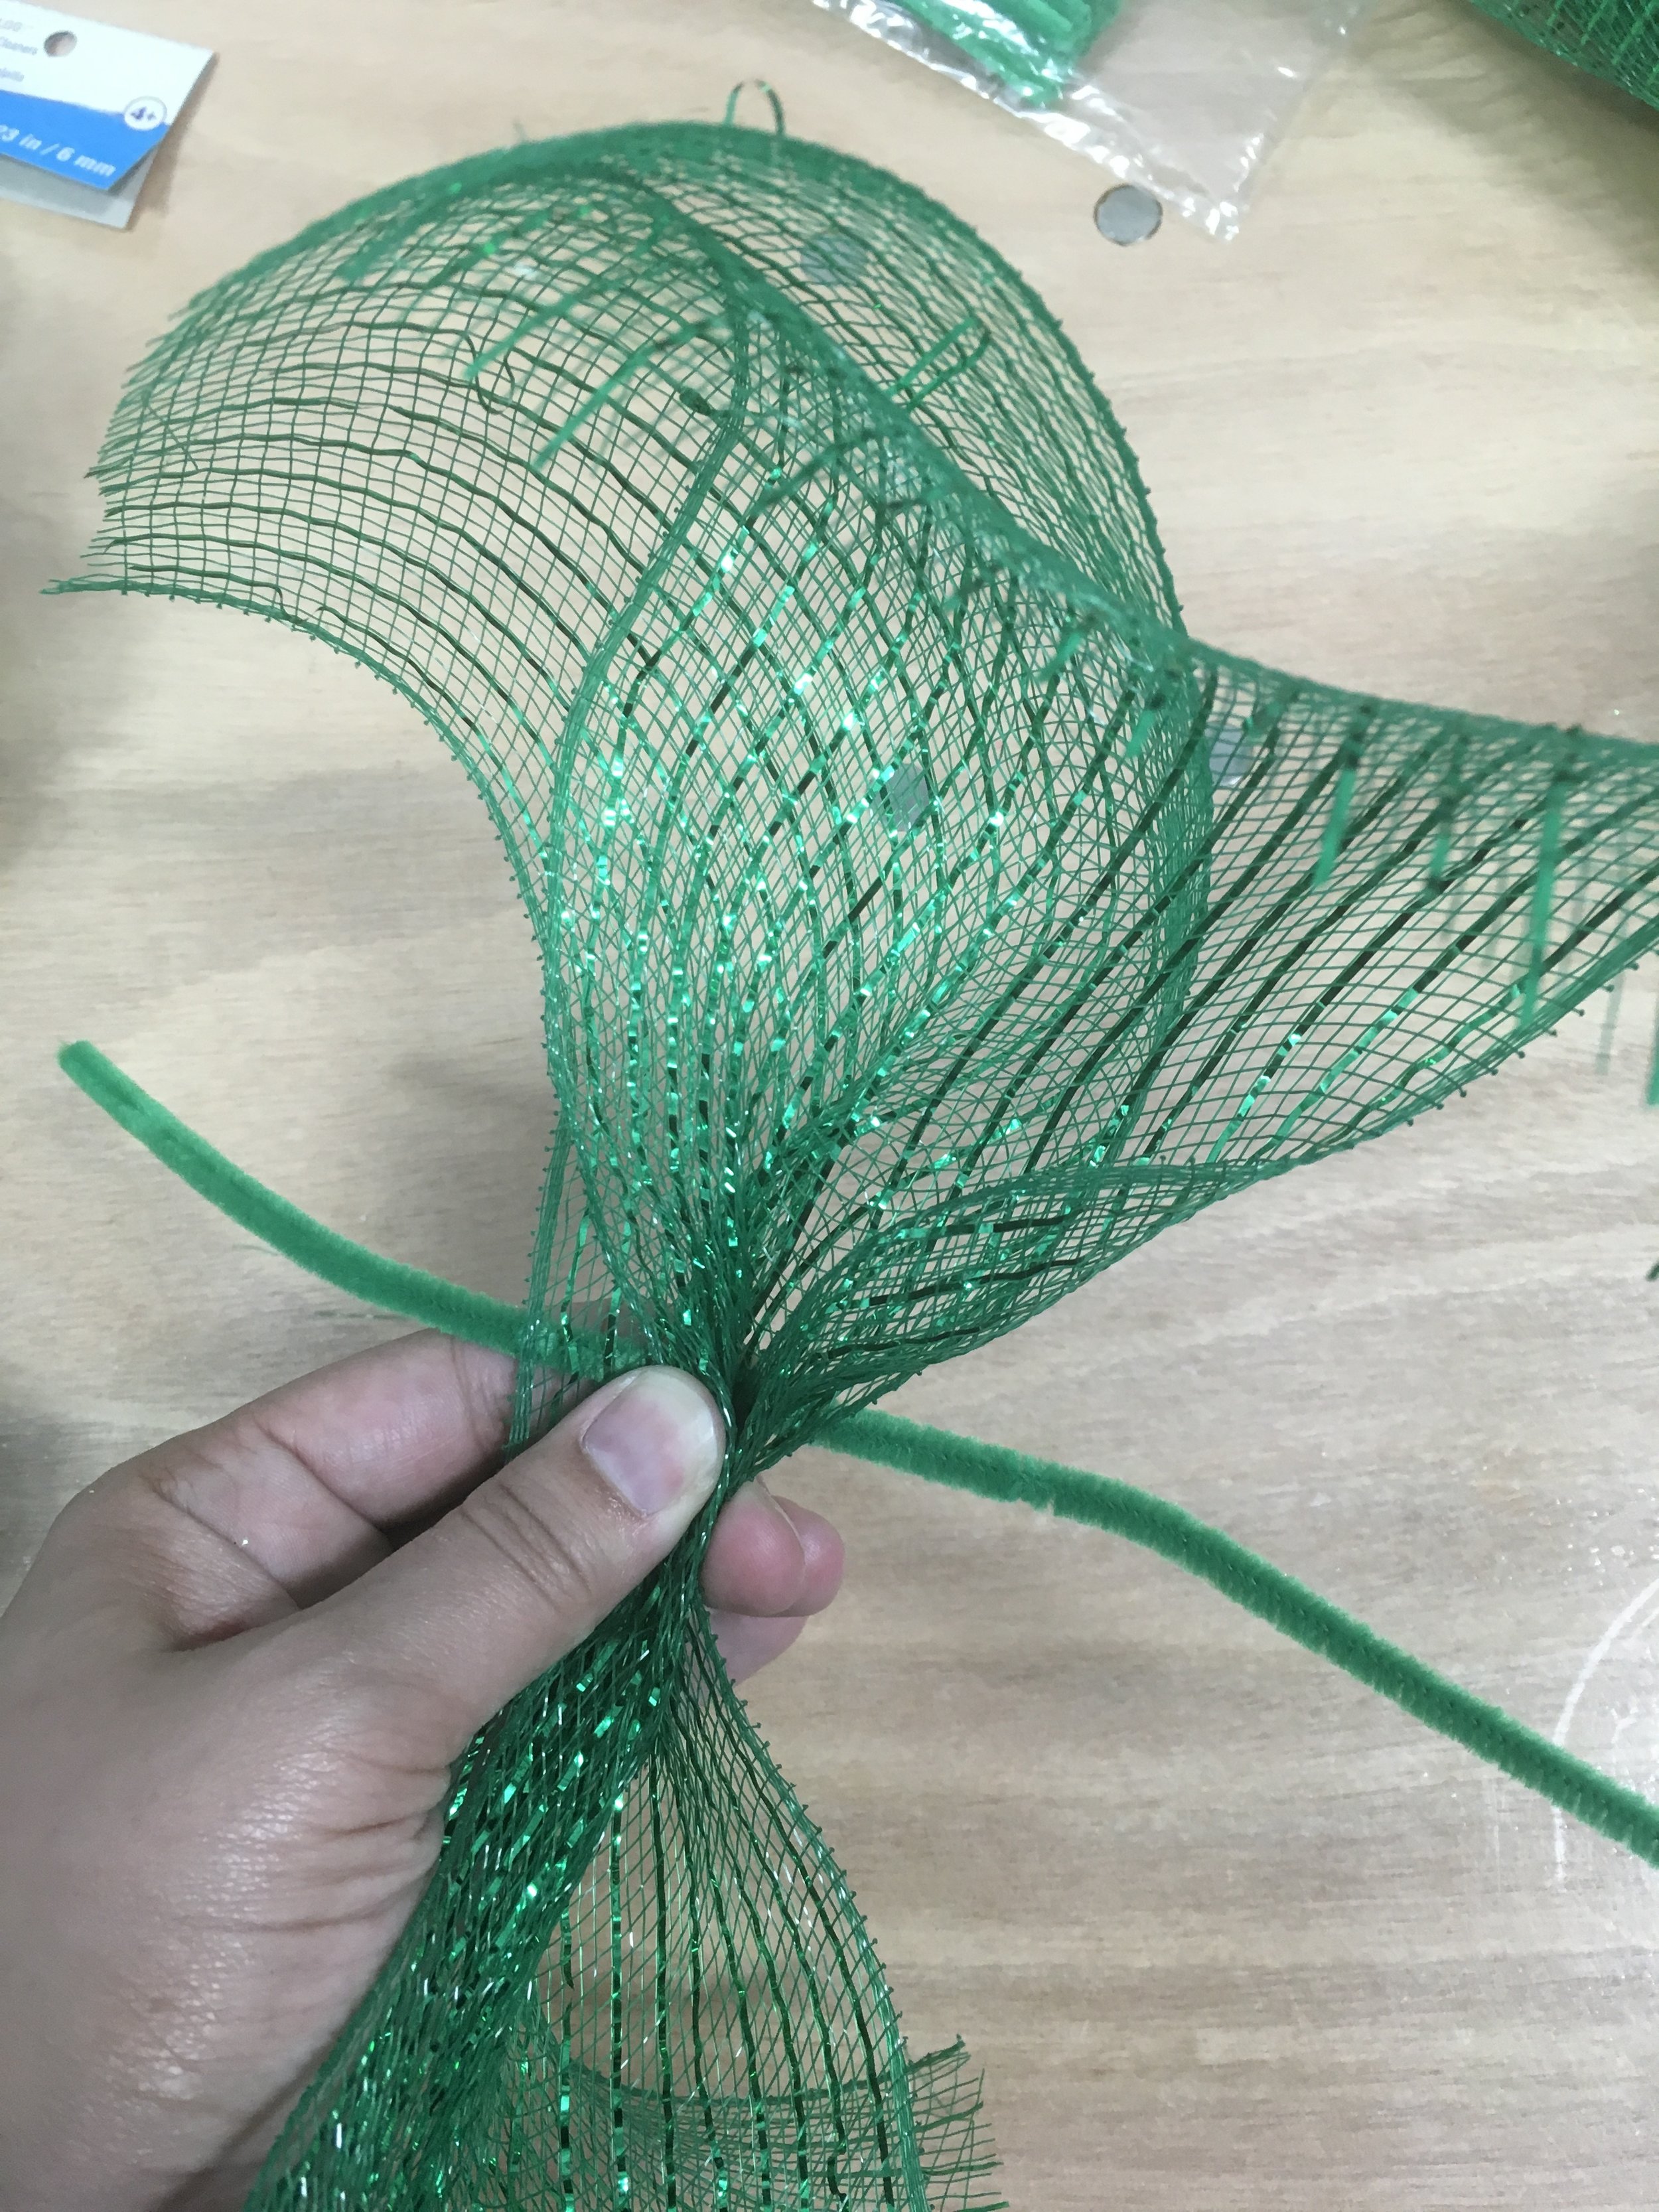
Step Three:
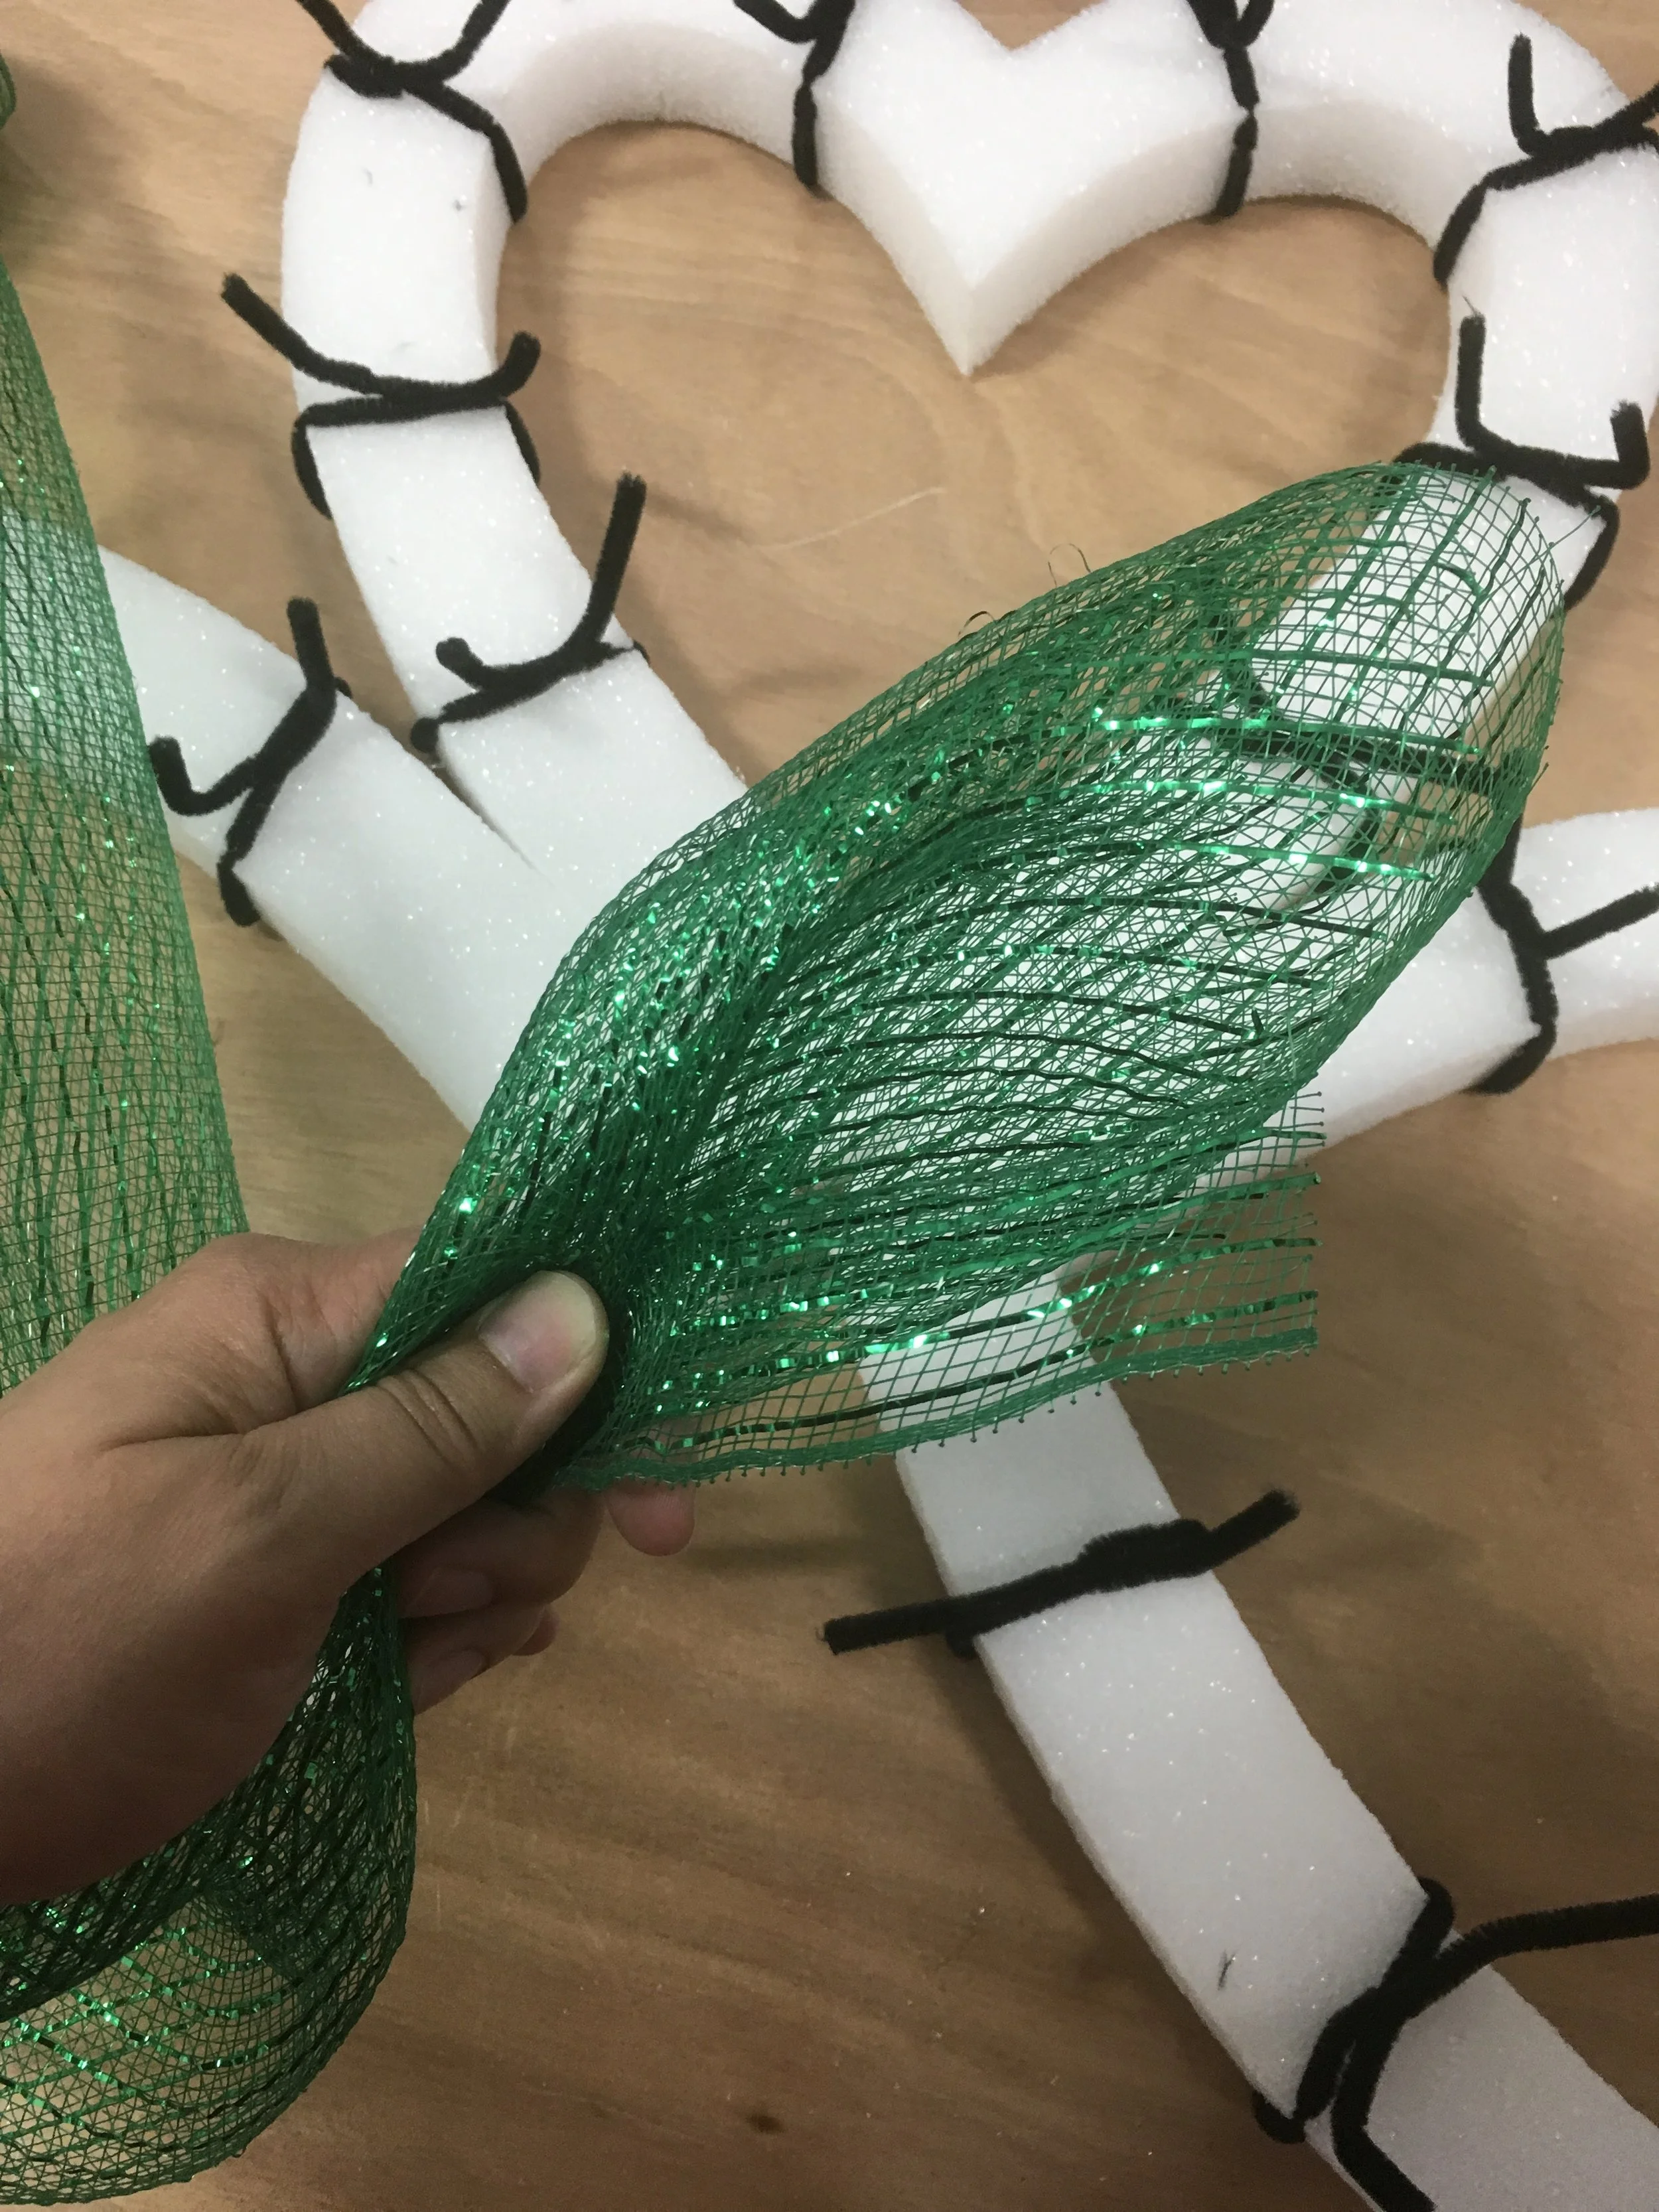
Gather the end of your mesh ribbon with your fingers. Then twist the mesh into one of the stems about 2-3 times to make sure it is tightly secured.
Step Four:
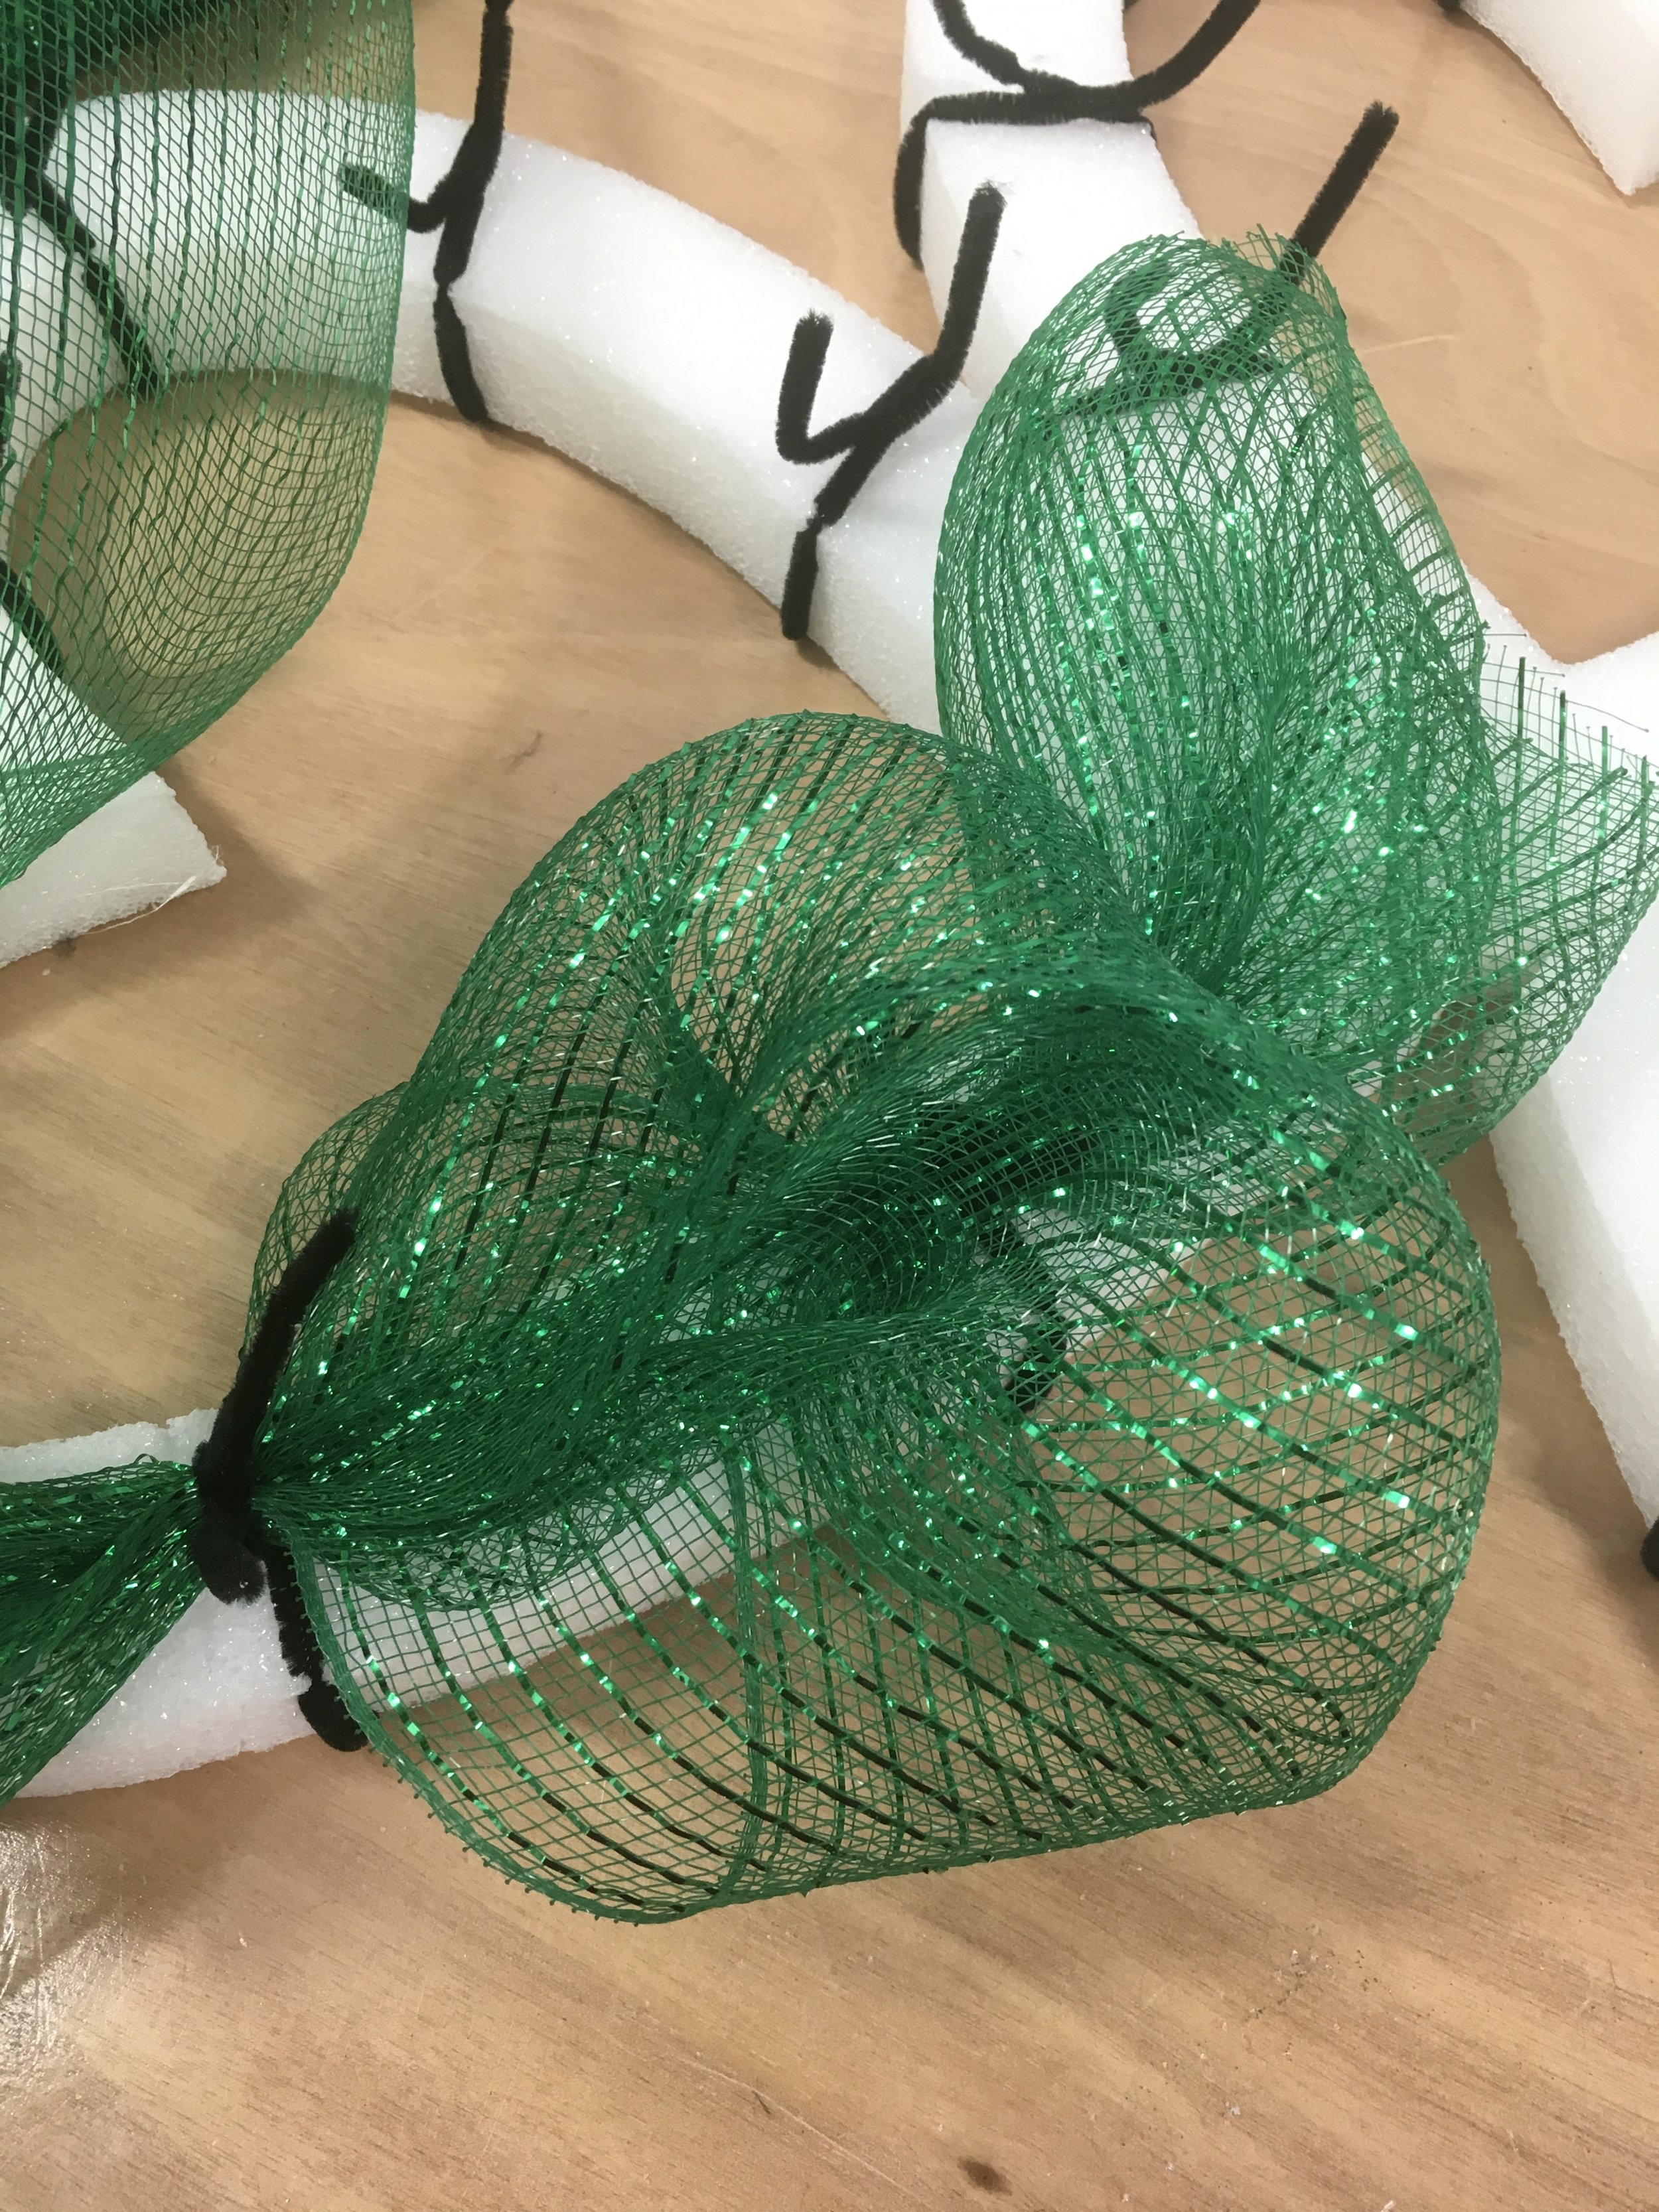
Take about 8-10 inches of the mesh and gather it into a puff, then tie it with the next stem on the inside row of the wreath form. You can create different looks with the floral mesh depending on how you twist and puff the material. Continue this process until the entire wreath is filled.
DIY TIP: See gaps??? No worries! Stay tuned, and I’ll show you how to cover them up…. :)
Step Five:
Using the 5.5 inch mesh, cut 2 6-8 inch strips (you can increase the length to your liking). Cross the strips to look like an X. Hold the strips together and tie a stem around the middle section of your strips. Curl them to your liking, and then tie the stem to the visible parts of your wreath.

Step Six:
Once you have finished “meshing” your wreath, you can hot glue your coins and whatever ornaments or trinkets you’ve decided to add to your wreath.
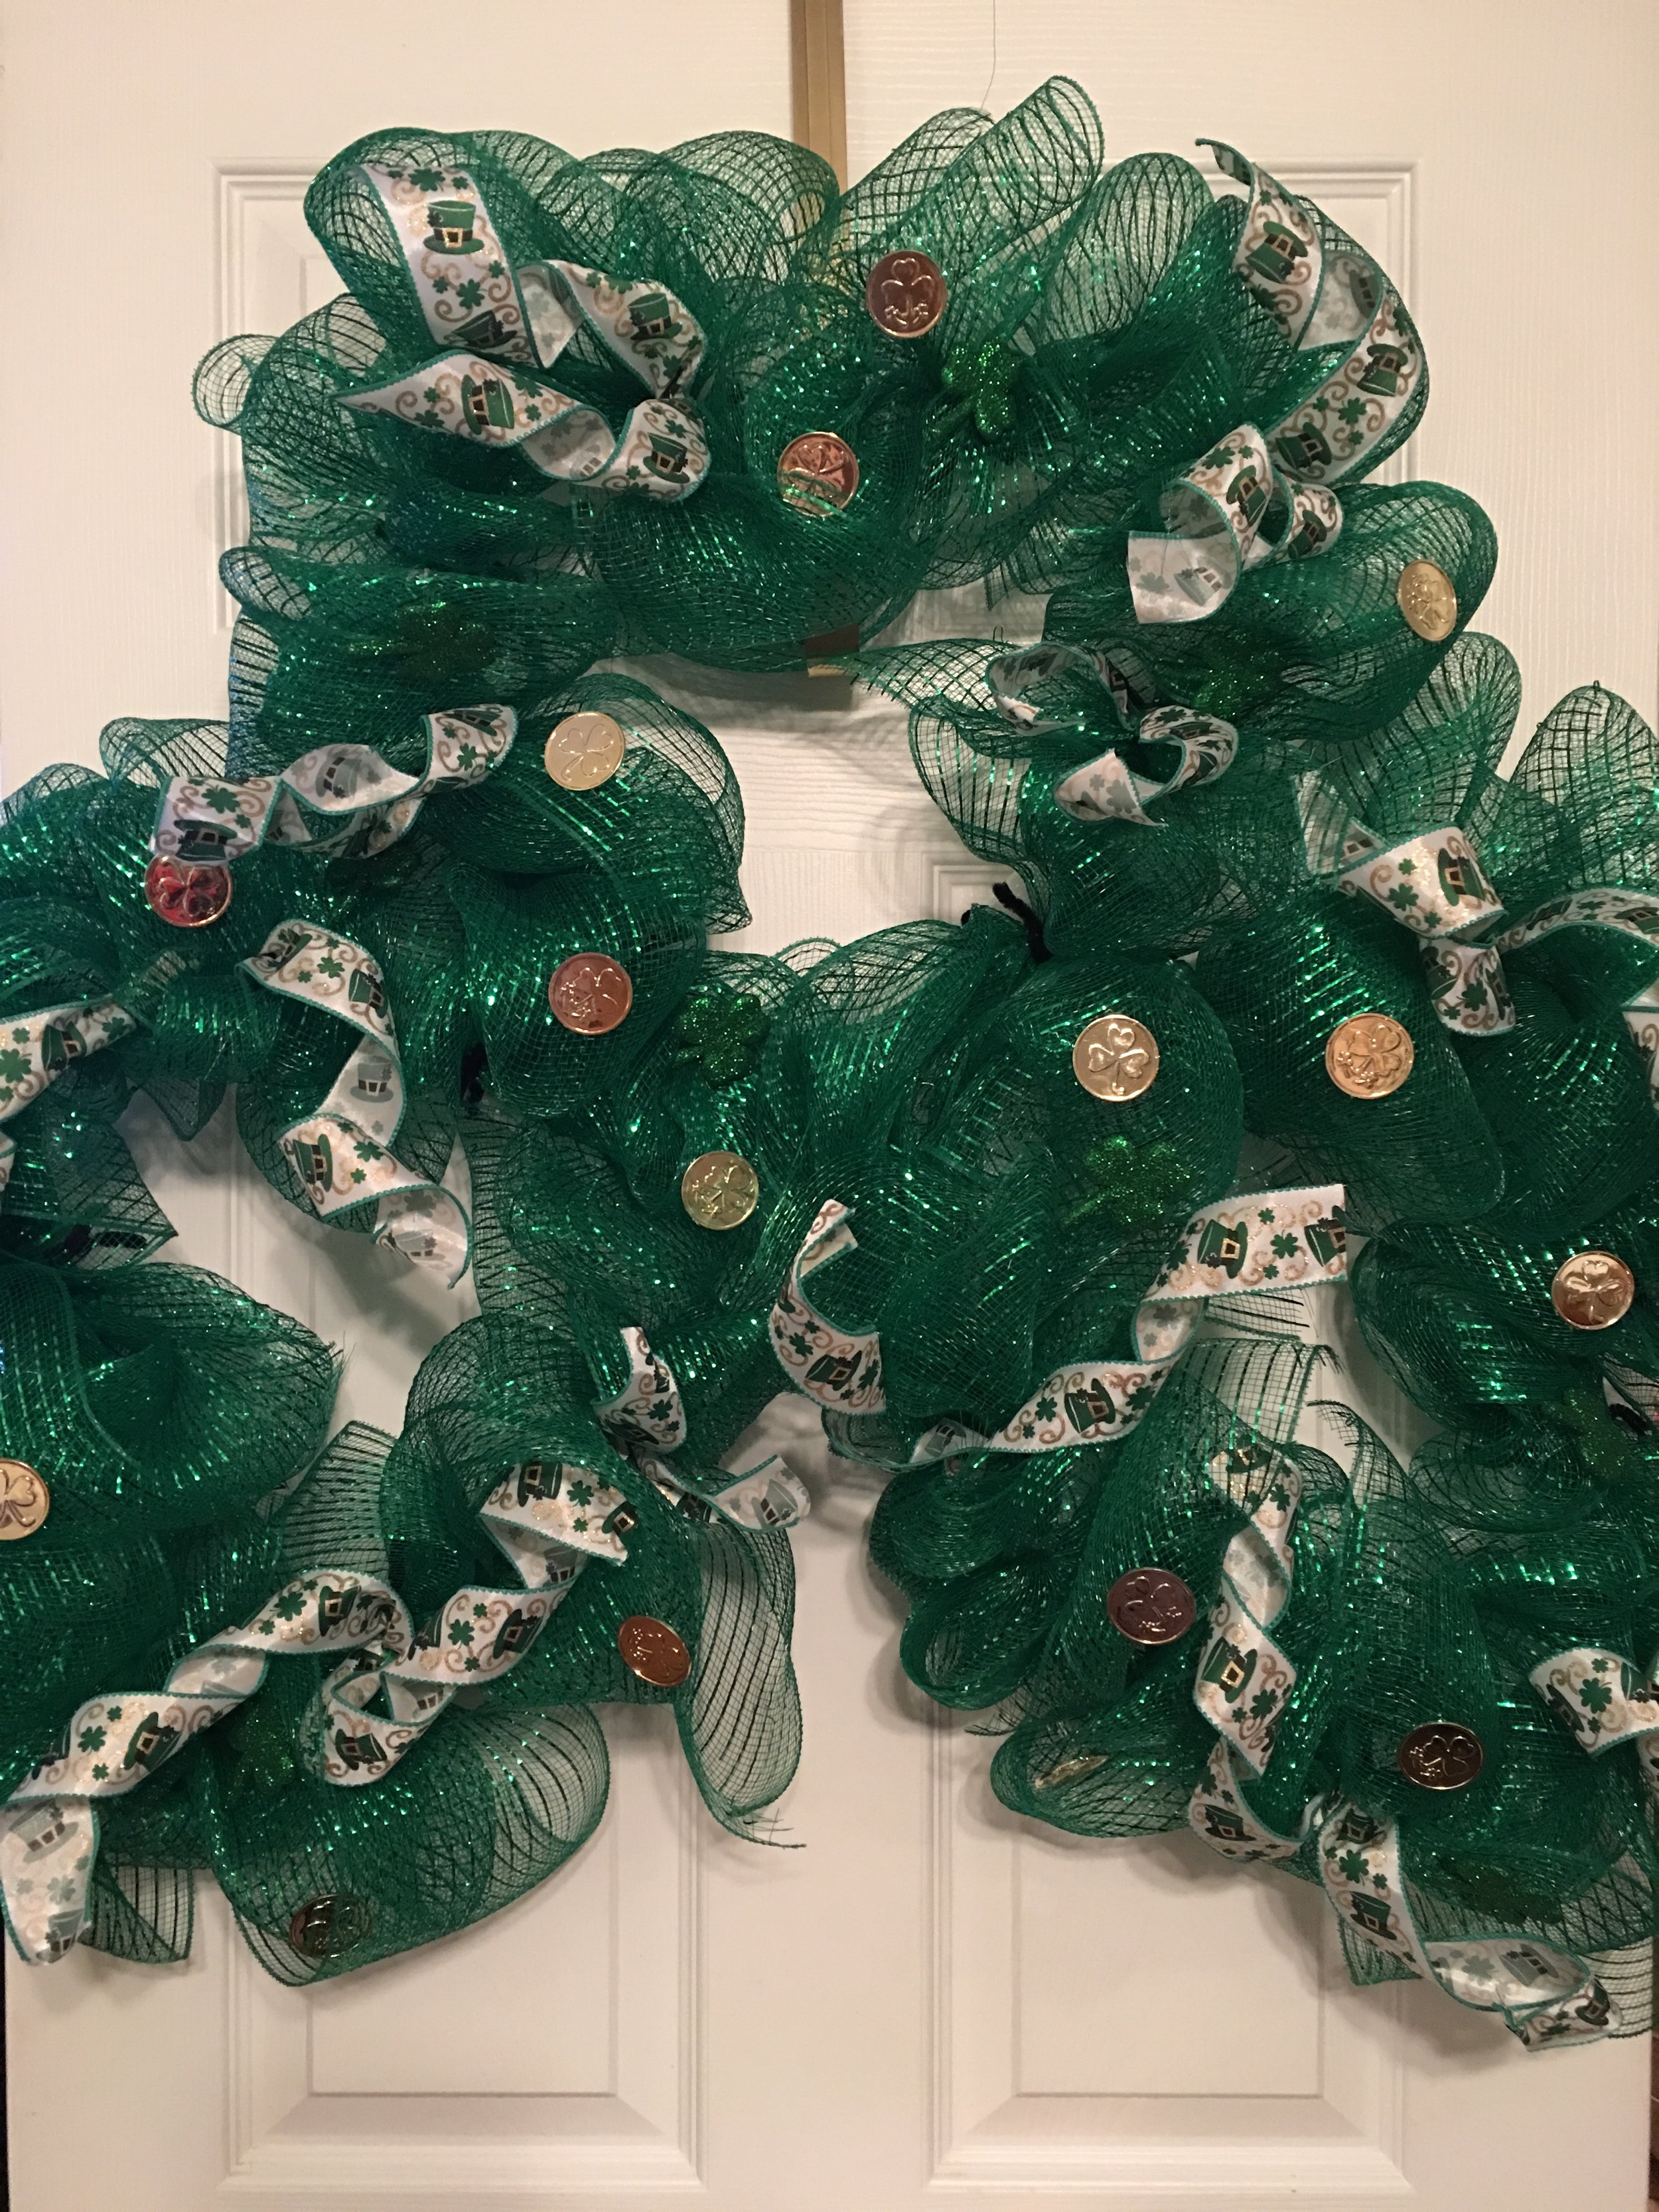
ALL DONE!!!!
For this to be my FIRST ribbon mesh wreath project, I would have to say that it was really easy. However, my clover idea was waaaaaaay over the top. this wreath is so much bigger than I expected, but I still love the way it turned out. I think I’ll make another one for Easter…. Stay tuned for deets.
Be sure to tag #thediaryofbellerose and @thediaryofbellerose on Instagram to show us your project. I would absolutely love to shout your creation out on my site. Happy crafting!